Ashar and I made this awesome (and yummy) no-bake American flag one summer as part of a project adapted from a recipe on a Christmastime box of Mini Nilla Wafers. Originally, they had a recipe to use the wafers, some melted white chocolate and some sugar sprinkles to make a candy cane. Cool, but… uh, it was June.
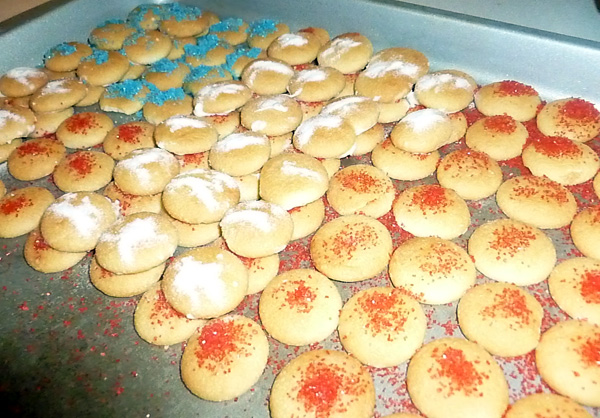
So we improvised. Having just visited Philadelphia, I said, “Hey, what about an American flag?” And Ashar was all in. You can do this with any shape – just make sure you have enough wafers, or you might hypothetically have to send Dad to the store halfway through the project (at 11 p.m.) That’s when the photo above was taken – midway through our efforts.
What you’ll need
– Mini Nilla Wafers
– White chocolate chips
– Microwavable bowl
– Basting brush (or two)
– Colored sprinkles
– Small amount of water
What to do
Think about the “base” of your shape. For our flag, obviously that was a rectangle. Lay out your Nillas flat on a cookie sheet in that shape. What you’re going to do in a minute is lay a second layer overlapping the first – but you want to do your colored sprinkles on your base first. So for our flag, the “base” rectangle was blue in the top left corner and red everywhere else – because the white “stripes” were the top layer.
 To get your sprinkles to stick, simply brush the Nilla Wafers with a little bit of plain water, then sprinkle the colored sugar.
Important note: If you’re using “white,” make sure to either get decorator’s white sugar crystals, or use confectioners sugar. Plain white sugar will dissolve on the water – not pretty!
When you’re ready to add your top layer, put a handful of white chocolate chips into a microwavable bowl and nuke ’em until they melt. You don’t want a “soft melt” – where your chocolate is thin – more the consistency of acrylic paint or so.
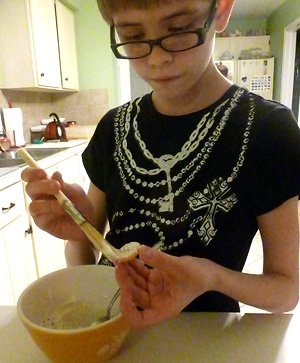
And that’s what you’ll do – get your basting brush and paint the bottom of more wafers with the white chocolate, then stagger them over your bottom layer of Nillas. (Ashar’s demonstrating her basting technique in the photo at right.)
Once you’ve got the top layer on, let it sit for just a couple of minutes in order for the white chocolate to set.
When it does, brush THIS layer with a little bit of water and sprinkle your colors carefully!
Another important note: If you don’t have the color of sugar sprinkles you need, you can make some. Take some white sugar and add a few drops of food coloring. It’ll at first “bead up” – but you can mix it in with a toothpick. That’s how I got our blue sugar, and it worked out very well, surprisingly!
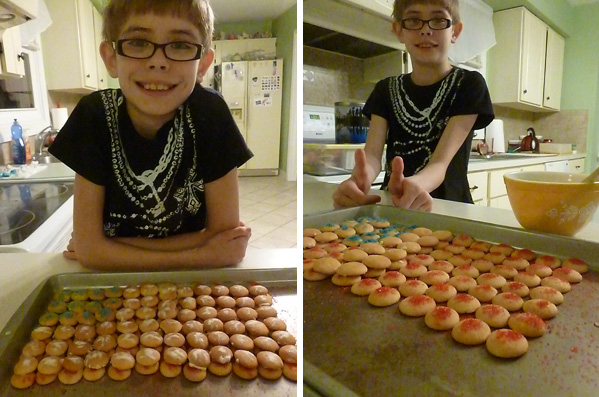
Ashar gave this project “two thumbs up” – literally. You can see her finished work in the left photo above; it’s hard to see the red unless you look down from the top, but when you start breaking it apart to eat… it’s there!
Fun, easy, tasty. Until…
Most important note of all: If, hypothetically, you store your projects like this in the oven, probably check the next day and take them back OUT of the oven before you preheat it for your dinner. Otherwise, you might find a really bad smell, a really messy cookie sheet and a child with tears rolling down her face, saying, “MOM, YOU BURNT OUR PROJECT!”
Guess you know what we’ll be making “Round 2” of this week, huh?!
These look so yummy, and they are very festive. 🙂 Thanks for sharing this at the Kid’s Co-op!
Didi, you’re very welcome! Thanks for stopping by!
I really liked the idea and recycled it for the 4th! Thanks (see…reading blogs comes in handy…never know what you can reuse!). Thanks!
YAY! Glad to hear it! I meant to repost it on the Fourth, too, and it totally got away from me 🙂
Hope your family enjoyed it.